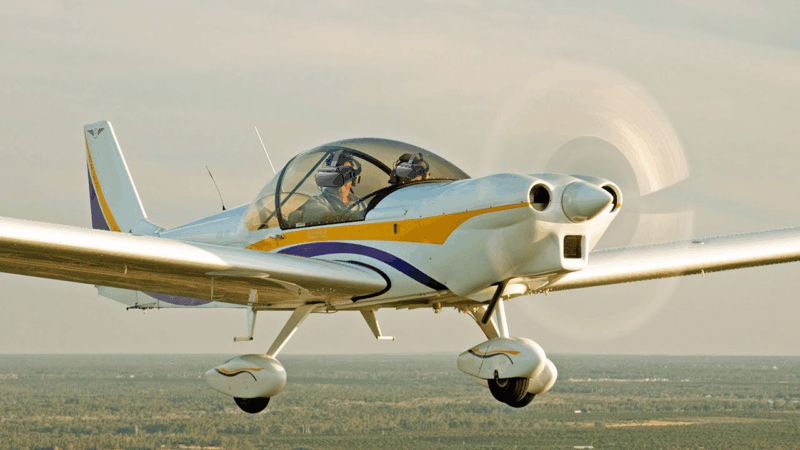
Flying Across the Country in a Small Plane in VR.
Let’s Fly!
Jumping into your favourite flight simulator and flying across the country in a small plane in VR (Virtual Reality) is an amazing experience everyone who loves virtual aviation should experience. Deciding where in the world to fly is the first decision to make. The world has so many incredible sights to discover with amazing natural vistas, incredible cities as well as all the seven wonders of the world. They are all at your fingertips in MSFS 2020 as well other sims like X Plane and Prepar3d.

Climb aboard your Cessna 172, fire up the engine and visit the amazing Pyramids, Taj Mahal or even Mt Fuji all in one day. Experience the vastness of the Amazon jungle or the vastness of the sandy desert landscapes of Saudi Arabia. Why not head to Mt Everest in the Himalayas where your breath will be taken away by the sheer size of the mountains in Virtual Reality. This is where the scale of the real world and VR collides.
It’s all available right at your fingertips. Virtual reality will bring the scale and size of the world to you, so you think it is real. Fly either day or night flight as you wish. The shimmering night lights of Tokyo await you and your small plane.
This would certainly be an amazing experience. How realistic you make your flight is certainly up to you. You make it as realistic as you like or alternatively just take a carefree flight in your VR aircraft.
Experience real world dynamic weather as you traverse the countryside in your flight with towering thunderstorms or beautiful clear skies all awaiting you. Do you feel the excitement I feel about this stunning opportunity? I hope I have inspired you to take the plunge and step into VR crossing the countryside in your small plane. Let the adventure commence!
Flying across the Country in a Small Plane in VR.
- Getting Prepared for A Flight in VR
- Planning the Flight
- Aircraft Choice.
- Start up & Departure.
- Pre-Take Off
- Take Off in a Small Plane.
- Why the Windsock is So Important.
- Take Off on Your VR Flight.
- Climb to Cruise.
- Enjoy the View.
- Auto Pilot is Your Friend
- Flight Simulator Choices
- Flight Simulator PC Requirements
- VR Headsets – The best Options
- Fly With Me in VR – MSFS 2020
Getting Prepared for A Flight in VR.
Flying across the country in a small plane in VR needs an awesome flight simulator with realistic environments and incredible aircraft to choose from. You will also need a powerful PC to power you on these many VR journeys discovering the world. If you’re not sure what you need then check out the bottom of this post for performance guides to get the best experience.
Let’s Fly.
Flying across the country in a small plane in VR – Planning the Flight.
Fire up your favourite simulator and get settled. You need to decide a couple things before getting in the air. Is this flight is going to be an IFR (Instrument Flight Rules) flight using Air Traffic Control or a VFR (Visual Flight Rules). VFR can use ATC as well but it’s less restrictive. Just let them know where you’re flying to and away you go.
Flying across the country in a small plane in VR – Level of Realism.
What you choose depends how serious you want to simulate your flight compared with real world. If you just want to have some fun that’s fine, it’s up to you as always. If you’re looking for more realism, then consider how your realism settings are in the sim. Generally, game to realistic on the sliders in your setting are the options. These can change the whole flight experience so check adding torque, wind shear, more realistic controls and more.
Flying across the country in a small plane in VR – Time to Fly.
How long do you have to fly? If you have an hour, then plan for around 100NM round trip. With a cruise of 110 to 120 knots this will get you around your scenic cross-country flight just fine. If you have an afternoon, you can travel a long way even in a small aircraft heading across country.
Flying across the country in a small plane in VR – Flight Route Planning.
Planning your route is pretty easy in Microsoft Flight Simulator 2020. Selecting the world map from the main menu you can use the mouse to drag and zoom to find your starting point.
Flying across the country in a small plane in VR – Create Navigation Points
It’s simply a matter of right clicking your mouse and you will have options for departure or arrival point. Select Departure.
If you have decided your arrival airport, then click on it and again right click with the mouse. The menu will appear again and set your arrival destination. You will now see a straight line on the map between the two points. This will appear on your map display if you have one in your small aircraft.
It’s a beautiful day so if you want to fly over the mountain lake on the map or a picturesque town near the lake. To add additional navigation points simply click on the map where you want to go first and select it. Right click again and select ADD to give you a new navigation point between your departure and arrival points. Congratulations you have a flight plan in place.
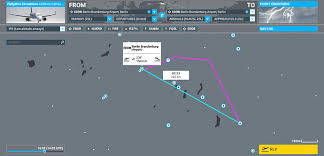
The flight plan above is a bit more complicated but shows you what is possible. Just remember to do them in order of the flight or they will zig Zag all over the map.
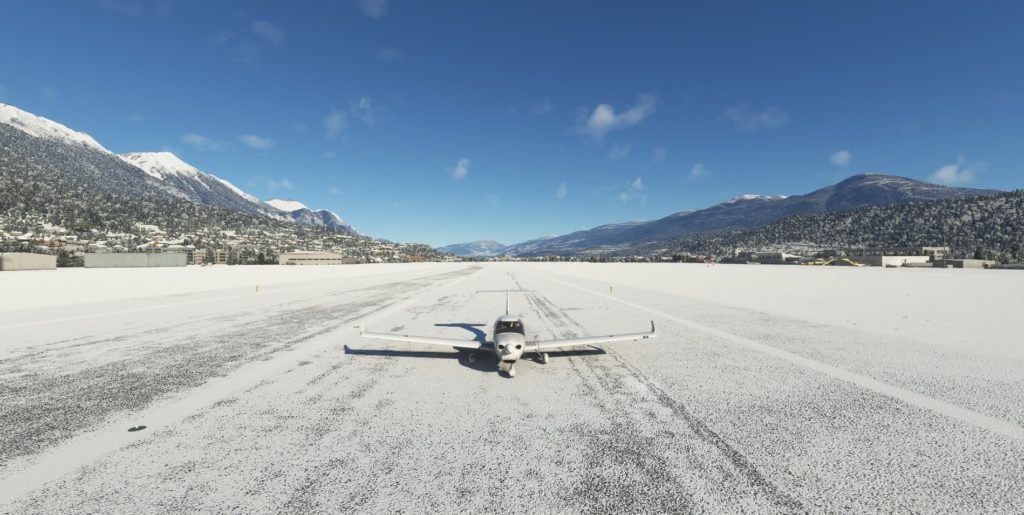
Aircraft Choice.
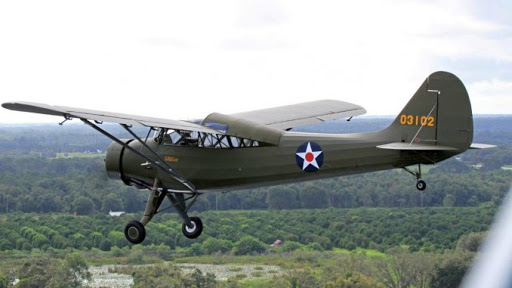
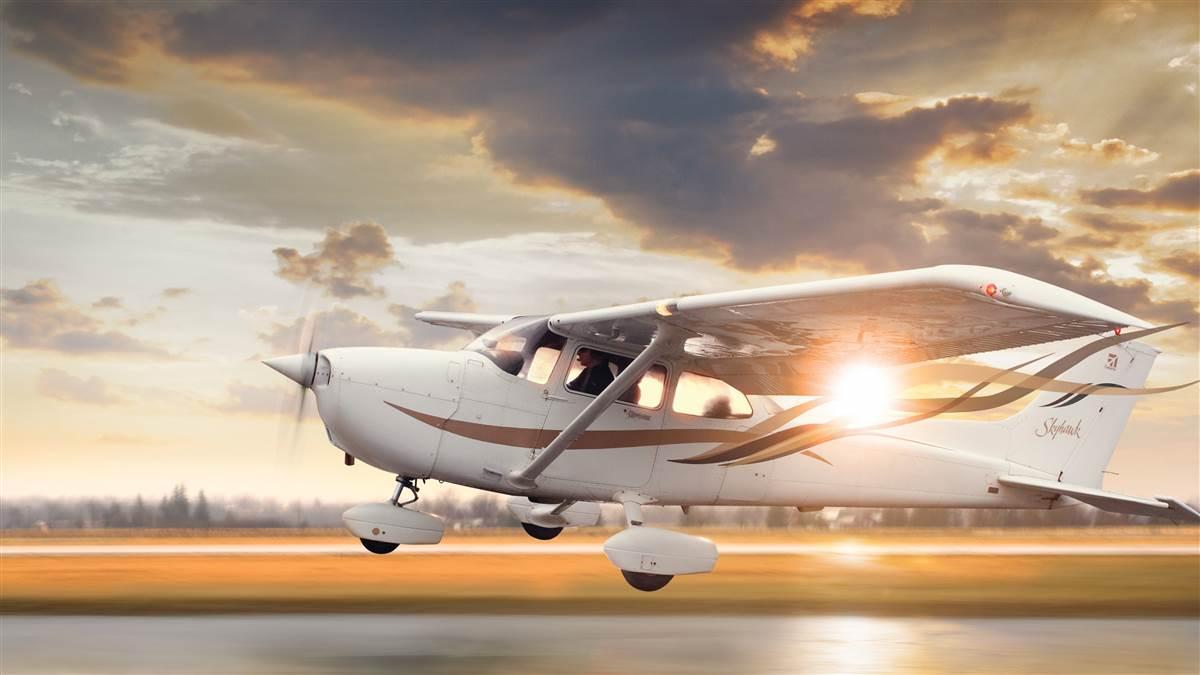
It’s time to choose your aircraft. Since this is a small plane there are some common choices in most flight simulators to make it easy. The venerable Cessna 172 is great choice for you to fly across country in a small plane in VR. The Cessna 150 is always a fun choice and is also aerobatic so you can impress your friends on the ground. Aerobatics like loops and rolls will certainly please the budding crowd below as you fly past.
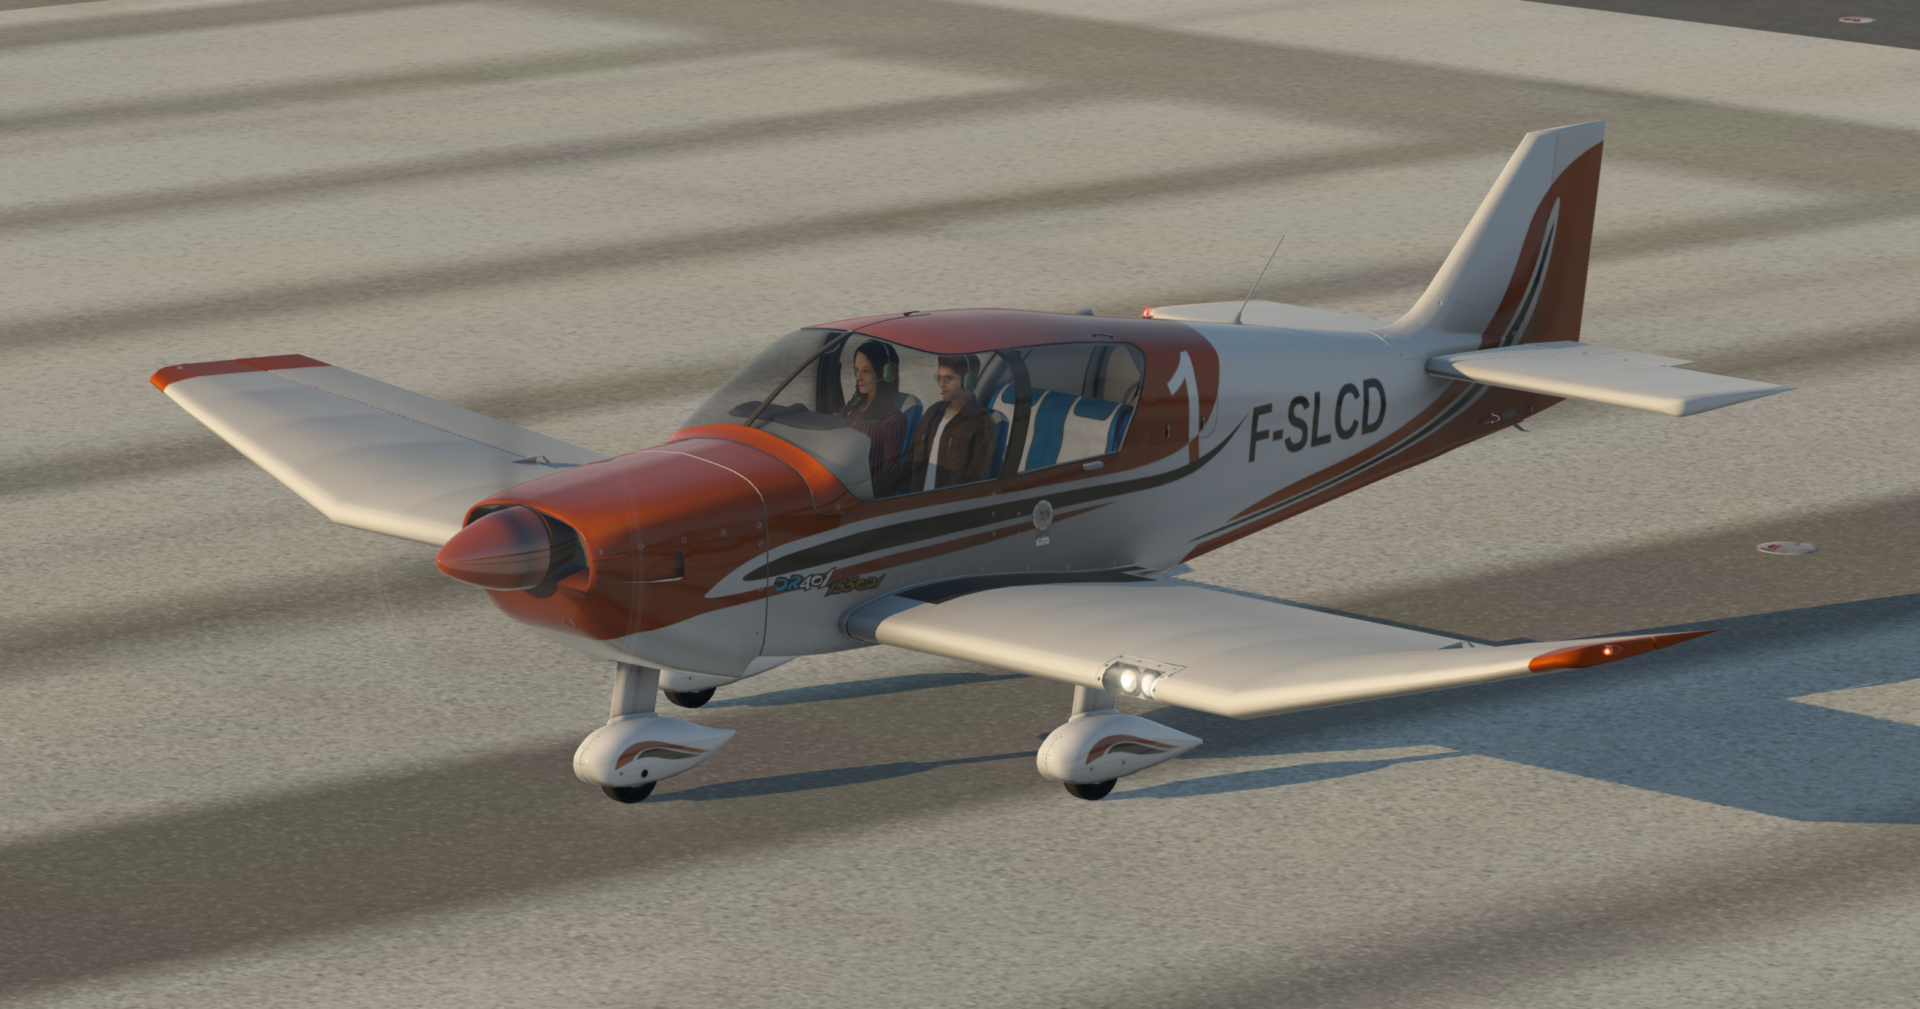
I have the Robin 401 and the Long Eze canard aircraft which are freeware and payware respectively. They are a lot of fun to fly. Payware add on aircraft are extremely high quality and very worth the money. If you choose an aircraft that has a glass cockpit you will be able to see your route on it. This makes it easy to follow in the air. A quick reference to your progress.
Fine Tune Start Location
Zoom in on the map to be more specific on start location. If you choose a random place that is not an airport you will start in the air over that point. You can choose the runway, and you will be all started and ready to take off. Choose the pan or parking area and you will be in an aircraft with all systems off generally.
Start up & Departure.
OK, select your aircraft and choose FLY. You will find yourself in your aircraft either engine running on the runway or on the pan cold and dark (engine off) depending on where you chose to start. Hit the communications menu and request either startup if you’re on the pan or take off clearance. Get your aircraft started up then all your systems. Check your flight plan is on your map display.
Taxiing to the runway you should check your engine temperatures are up to operating temps. Before you take off. It’s also important that you check your ignition system called magnetos.
Pre-Take Off – Magneto -Trim.
If you’re in a Cessna 172 set the brakes and run up the engine to 1700 rpm. On the dash you will see the start key. It will be set on both. This means that it’s using both the magnetos. Turn it to left and there will be a 50 rpm drop in rpm normally. This is good. Turn back to both and the rpm should return to normal. Next turn to right and see the same thing happens.

If you select left and the engine stops that magneto is bad. Head back to maintenance for a repair.
Failures On is Great Realism.
Failures in realistic mode are a great idea as they can happen anytime. If you need to deal with one, it makes the flight even more interesting. Gives you practice if you’re learning to fly for real. Always be prepared!
Check your trim wheel on the centre console is set correctly. There is a take-off setting normally on it. Ensure it’s set correctly and when the aircraft is ready it will lift off like an angel.
Take Off in a Small Plane.
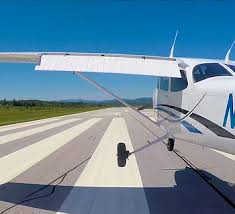
Taxi out onto the runway and ensure the windsock is pointing toward you. This tells us the wind is coming from in front of us. We always take off and land into the wind when we can.
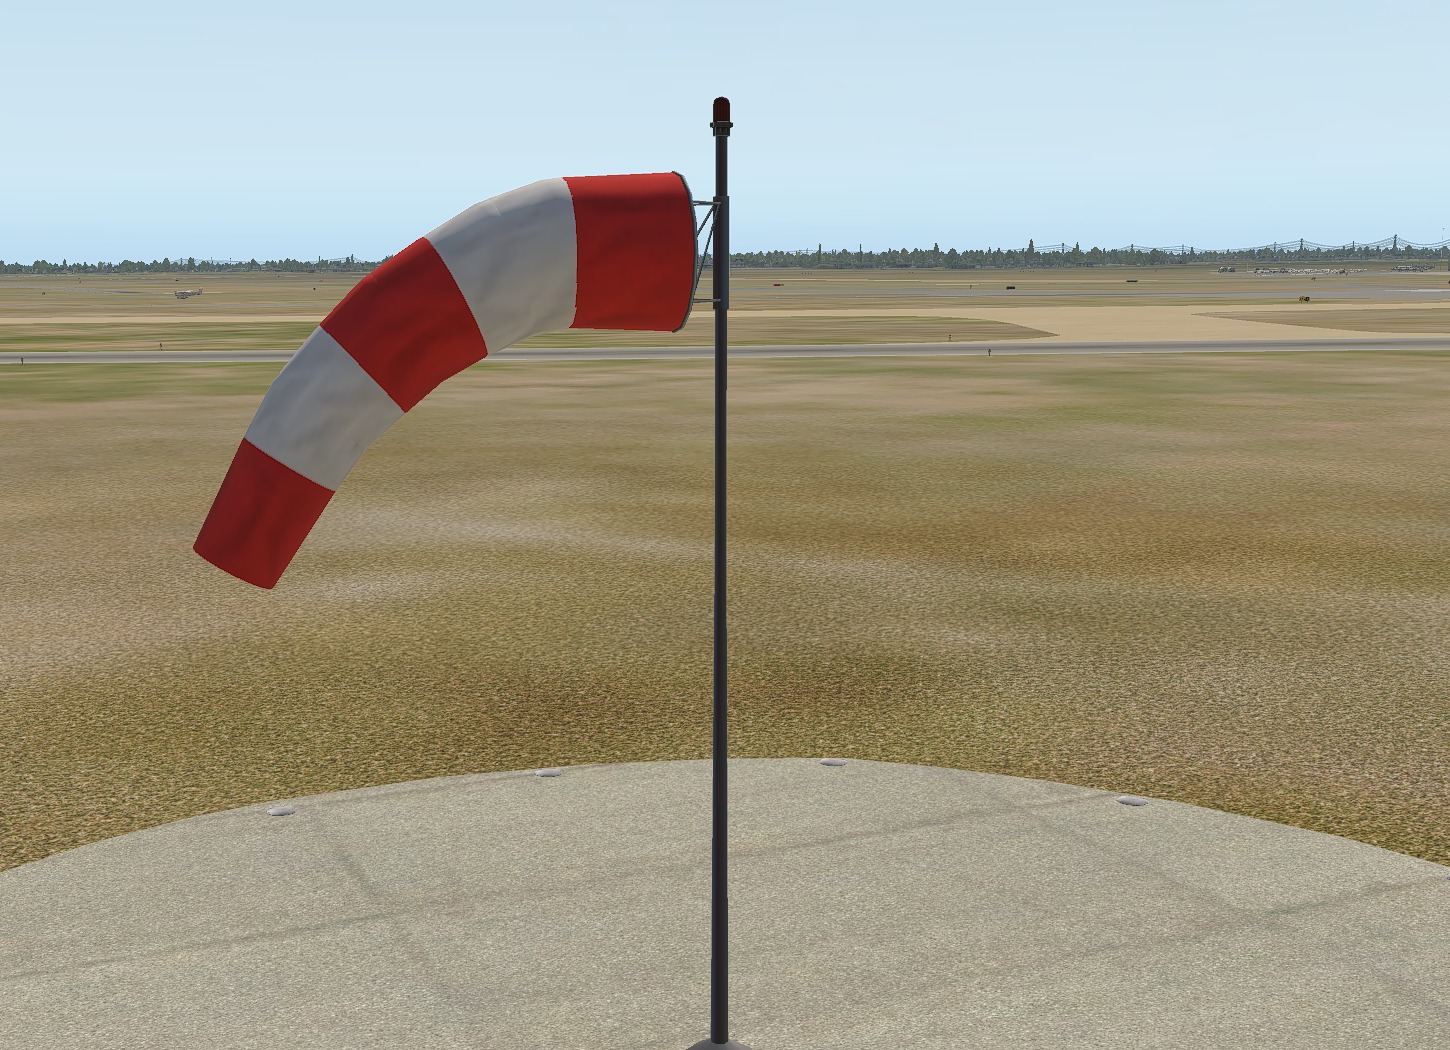
Why the Windsock Is So Important!
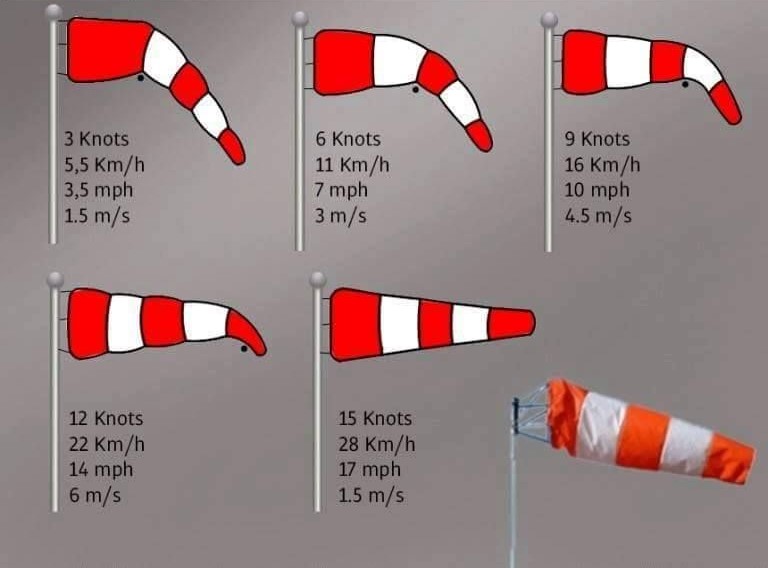
Quickly let’s look at the windsock because it is so important! When leaving and arriving at an airport it’s so importantly that you always check your take-off is into the wind. The windsock also tells you both the speed and direction of the wind. You Need this to be ready to counteract the wind both taxiing and when you are taking off or landing.
It will stop you from crashing if you’re ready for gusts and wind changes of direction. Wind is always ready to surprise you. You can always see the windsock from the air as they are either white or orange. The amount they hang down or stand up tells you the wind strength.
Flight Sims – Animated Windsocks
Flight simulators all have animated windsocks so check them out. It will ensure you don’t upset other pilots using the wrong runway online. Causing a crash with another aircraft or player won’t make you friends.
Take Off on Your VR Flight.
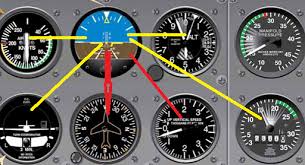
Taxi out and line up for your aircraft on the centreline of the runway. With the brakes on bring the engine power up to say 80 percent and check all your engine instruments are in the green and no warning lights are on. Check all the compasses agree on your heading.
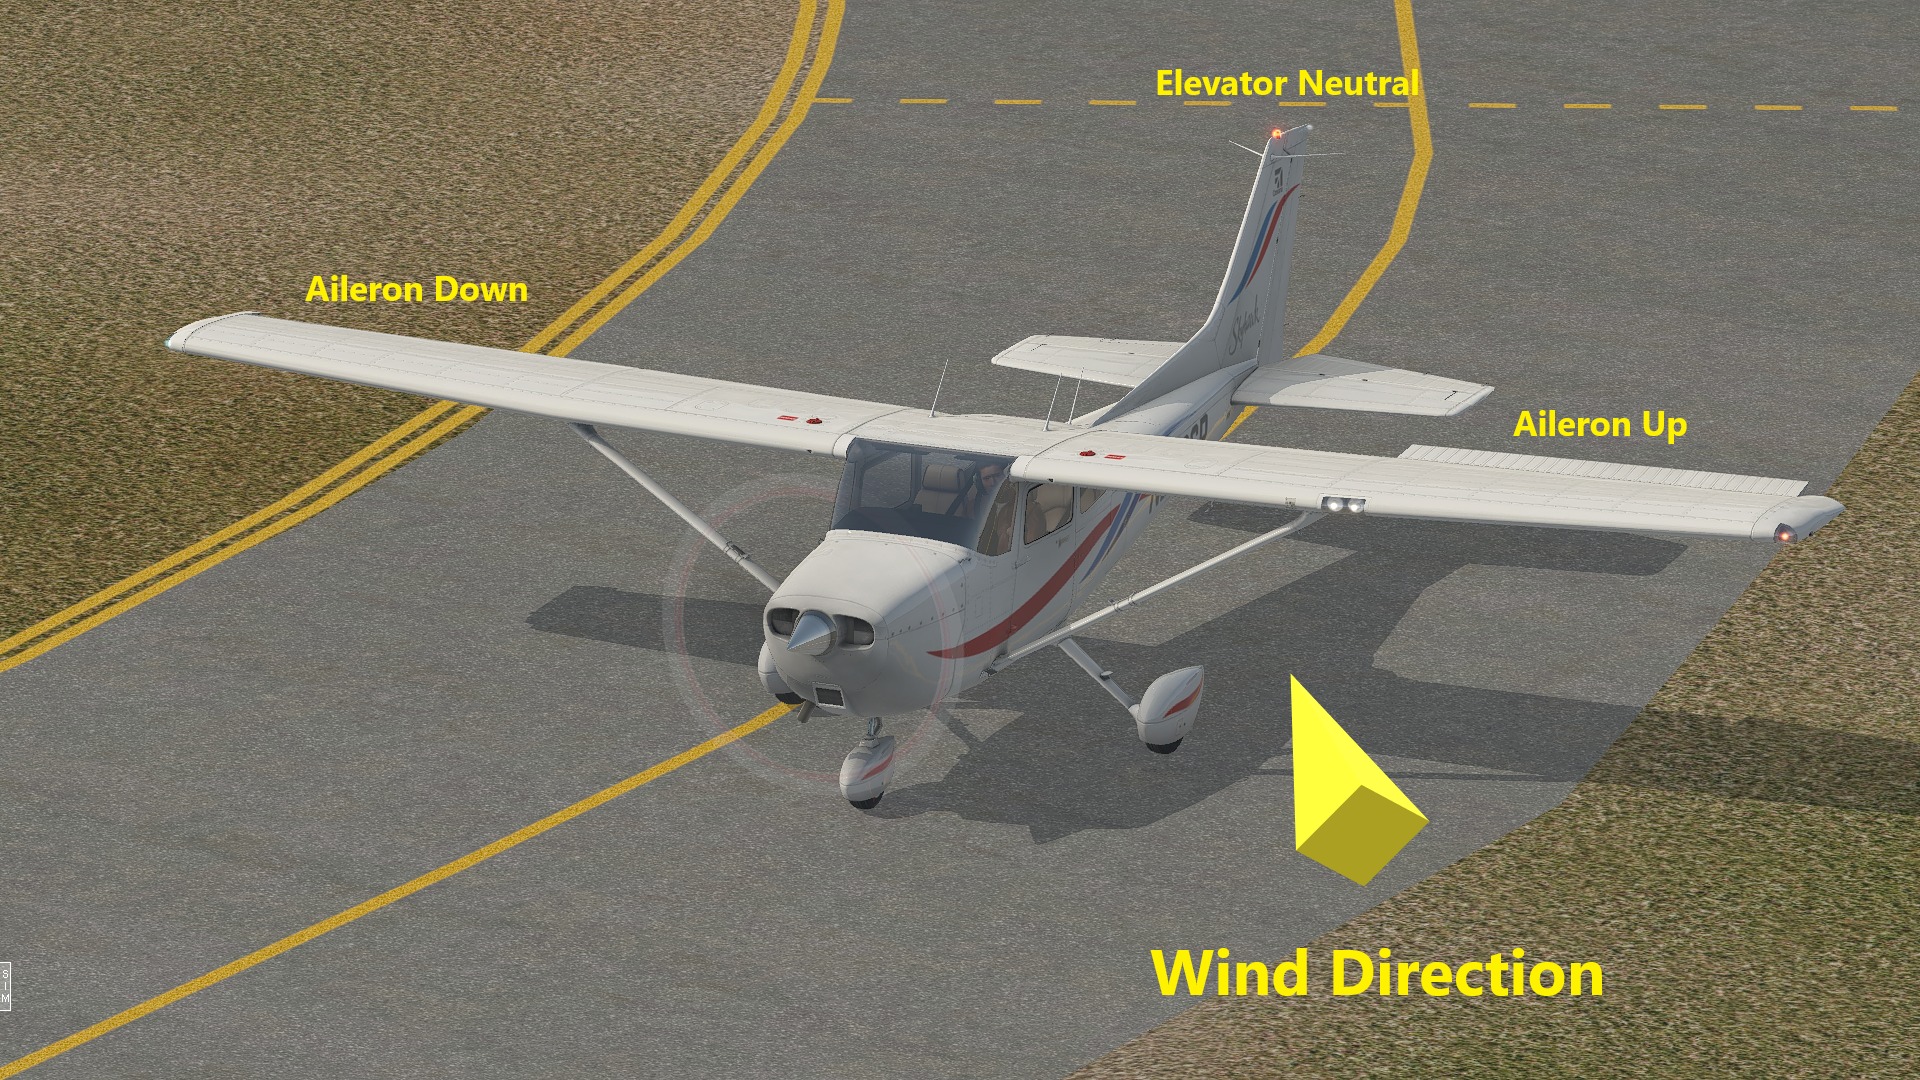
Release the brakes on your Cessna 172 and push the throttle to full power and use the rudder to stay straight on the runway. You will experience the aircraft wanting to go to the left normally. This is the torque from the engine and prop wash hitting your rear vertical stabilizer.
Add as much right rudder as you need to stay straight. Hold the aircraft straight and as you get to around 60 knots the aircraft will leave the ground smoothly and climb away with a little help from you.
Climb at about 75 knots in your Cessna 172 all the while adjusting the trim, so it climbs, and you don’t have to push or pull on the controls.
Climb to Cruise.
Climb straight till your at least 500 ft. Once you reach 500 ft start a gentle turn towards your planned route unless using ATC where they may send you in another direction initially. Remain at full power for a couple minutes then lower your nose and reduce power to the climb setting. You will see placards around the cockpit with speeds and rpm settings for every situation. You can’t stay at full power as the engine will get to hot. Monitor your engine instruments continuously and be actively monitoring it for issues.
- Joystick / HOTAS – AMAZON.com
- Rudder Pedals – AMAZON.com
- Throttle Quadrant – AMAZON.com
- Gaming Chair – AMAZON.com
- VR Headset – AMAZON.com
Continual Monitoring Required.
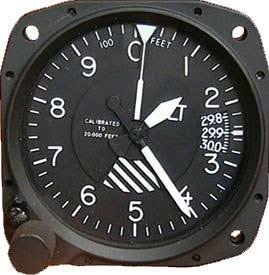
Monitor I our cruise speed as you climb to your chosen altitude. The altitude must conform with VFR rules under the transition level. The transition level is where you go from a local pressure setting for your altimeter to a standard setting. Generally used by commercial aircraft but private aircraft can exceed the transition level in some countries with appropriate qualifications.
VFR altitudes are set at travelling East from 0 to 179 degrees are odd altitudes plus 500 ft. So, you have options of 1500ft, 3500ft, 5500ft etc. If you’re travelling in a Westerly direction i.e.. 180 to 359 degrees you must fly even altitudes. These are 2500ft, 4500ft 6500ft etc.
Choose an appropriate altitude for your course and maintain it. Plus, or minus 100ft is your generous tolerance. It’s a professional standard to keep your chosen altitude and not wonder around the sky. This is why accidents happen, and aircraft have mid-air collisions.
Enjoy the View.
It’s a great time to now relax a little and check your surroundings. It’s required you constantly check your course, your altitude and your surrounding weather as well as other traffic. Keep your eyes outside the aircraft most of the time.
Keep ahead of the aircraft being ready for your next task no matter if it’s a change of direction or a change in radio frequency. Having said this the whole reason you’re flying across the country in a small plane in VR is to enjoy the view so there is a tool to keep you in control and allow you some time to enjoy the magnificent view. That tool is the auto pilot.
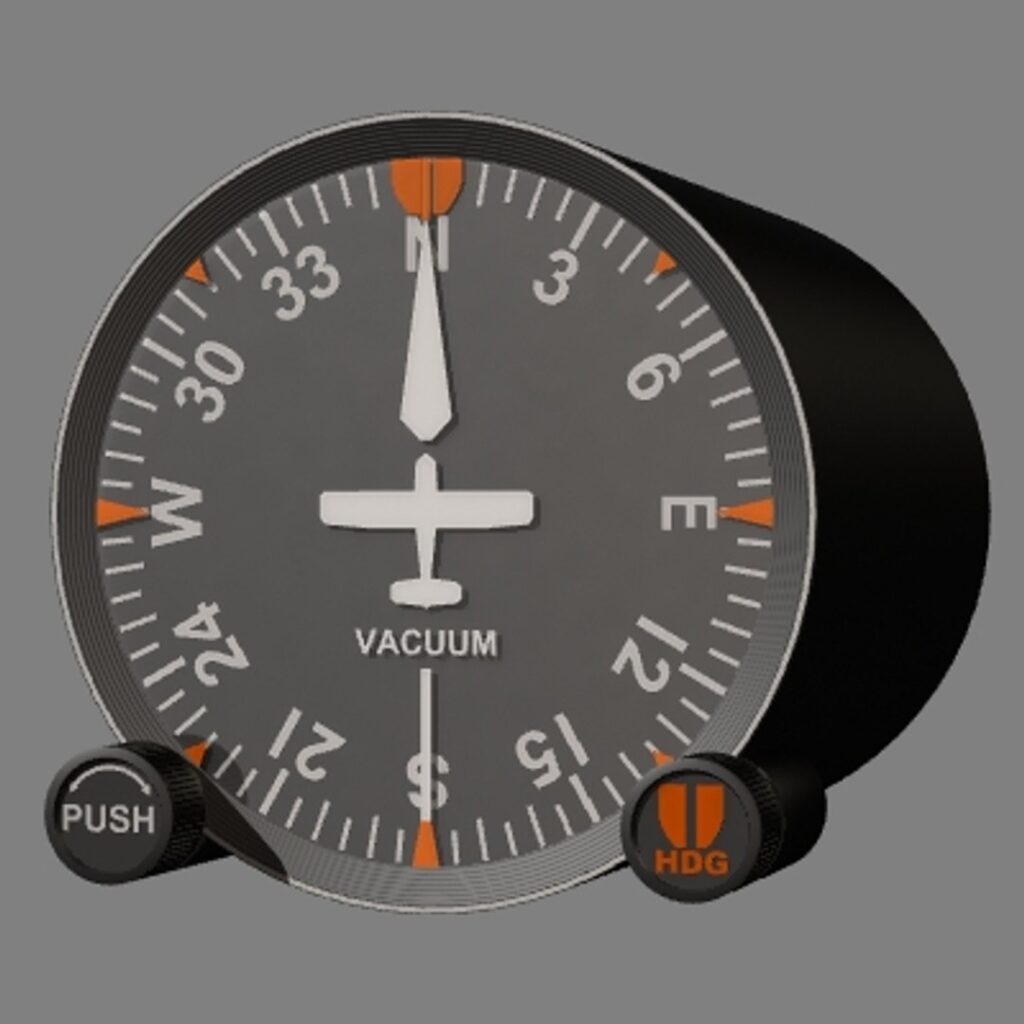
Auto Pilot is Your Friend.
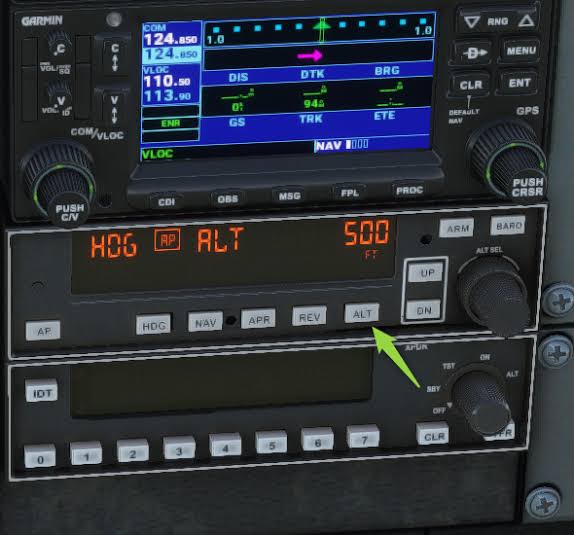
Auto pilots are not in all aircraft but Cessna 172 with a glass cockpit probably going to have one. Simply the auto pilot can hold an altitude or heading or both. It is capable of helping you land but that’s a subject for another post.
The auto pilot is easy to operate and once set it will maintain the altitude and heading your set.
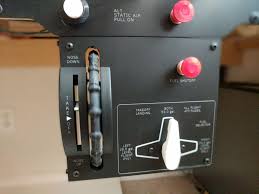
Altitude has to be set manually by using the rotating know. The display will show the altitude you have input into the auto pilot. Press altitude and it will fly to and hold that altitude. Note if you’re at 2000ft and set 4500fr for example ensure you manage the engine power, or it will try and climb then small. Not ideal.
Heading is controlled by the heading indicator and where you set the heading bug. The heading indicator bug is on the lower right hand side of the instrument. Rotate the bug to the required heading and the aircraft will follow your setting. In the example below the aircraft would turn from 000 degrees to 330 degrees. Now you can enjoy the scenery as you fly across the country in your small plane in VR.
Time to Land.
You have been flying across the country in a small plane enjoying the sights and sounds. The scenery has been amazing for sure but now it’s time to land your Cessna 172. Planning your decent is pretty easy providing you have everything set up.
We will presume your arrival aircraft is at 500 ft AMSL (Above Mean Sea Level) and you have the latest ATIS information. The ATIS is airport information that is updated frequently and gives you the runway in use plus the required reporting points as well as wind direction, strength and finally the local pressure setting.
It’s advisable to do this when you’re in-radio range of the airport. The Sim ATC menu will have an ATIS selection when your close enough so click on it and listen to the information.
Adjust your altimeter to ensure your altitude is correct. The setting will show in the windows on the instrument. The profess is the same on a glass Garmin cockpit display if you’re using one.
Knowing When to Descend.
Determining your top of descent point as it’s known or where you will be decent to the airport is pretty easy. It’s common in small aircraft to decent at a casual 500 ft/min. If you’re flying at 6500 ft on your flight across the country, you need to descend to 1000 ft above ground level for the airport traffic pattern. We can see on the map the airport is 500 ft above sea level so pattern height will be 1500 ft indicated on the altimeter.
If we subtract the airport altitude from the height, we are flying we will know how far we have to descend.
6500 ft -1500 ft = 5000 ft
If we are planning to descend at 500 ft per minute, it will take 10 minutes.
5000 ft altitude ÷ 500 ft per minute = 10 min
So, we know to decent ten minutes out from arriving to join the traffic pattern. If we are flying at 100 knots that means west travel a distance before we arrive at the correct altitude. So how far away do we start our decent?
100 knots ÷ 60 minutes in an hour = 1.6 Miles per minute approximately.
So, I’d we want to decent 5000 ft to altitude, and it will take 10 minutes at 500 ft per minute then:
10 minutes to decent x 1.6mile per minute = Decent distance from the airport.
10 x 1.6 = 16 miles.
So, you can see your distance on the aircraft map or using radio beacons to find range to airport or simply look at your VFR map and measure 16 miles from the airport.
VFR Reference Points.
Look for a reference point on a VFR map is pretty easy. Microsoft Flight Simulator 2020 as well as X Plane all have VFR maps available even when flying in VR to use. If you need a reference point look on the VFR map look for something about 16 miles from the airport as a reference. It could be a small town, lake, river bend or road intersection.
Planning is key so in advance program your autopilot with desired altitude and decent rate and have it ready to activate. When you reach the visual reference select the autopilot or manually trim and hand fly the aircraft at 100 knots with a decent rate of 500 ft per minute. You will arrive at the airport at your chosen altitude and time leaving from 16 NM from the airport. It’s pretty easy isn’t it.
Pattern and Landing.
It’s time to land so as you’re approaching the airport level off at 1500 ft being pattern altitude. Reduce. Power and trim for the top of the white arc on your speed indicator. This will be about 90 knots. Once you have slowed maintain height and trim to maintain altitude. You can select 10 degrees of flap now. Your view will change a little nose down so be ready as the flaps extend. The flaps cause extra drag so your aircraft will slow. Monitor the speed and keep it at no less than 90 knots.
Pre Landing Checks.
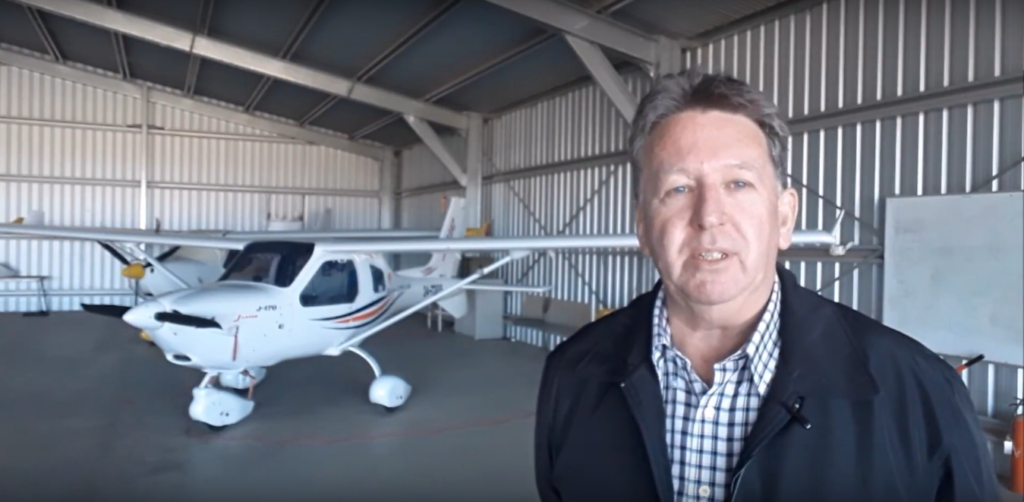
Do your pre landing checks now. They vary with aircraft but my own when flying the Jabiru 170 were:
- Brake Pressure – Check pressure.
- Fuel Quantity – OK
- Fuel Aux Boost Switch – on
- Harnesses – Tight
- Hatches/Doors – locked
- Heat – Engine heat on (cold weather to prevent icing in the carburetor.
Pattern & Land.
We will aim to enter the downwind leg of the pattern. Fly in and ensure your clear of any aircraft either taking off, climbing on the upwind leg or around the pattern and check the runway is clear. Lots to look at and ensure you do. Mid air collisions happen to often because pilots don’t simply look.
Fly down the downwind left at about 90 knots, as you pass your expected touch down point slow to 80 and add flaps 20. Your speed again will drop a little. Once the runway threshold is behind you about 45 degrees reduce power and commence a 500ft/min decent at around 80 knots.
Pitch for speed and power controls decent rate. Generally, a reduction in power of 100 rpm will give a 100 ft/min decent rate. 500 RPM= 500ft/min approximately.
Turning Final.
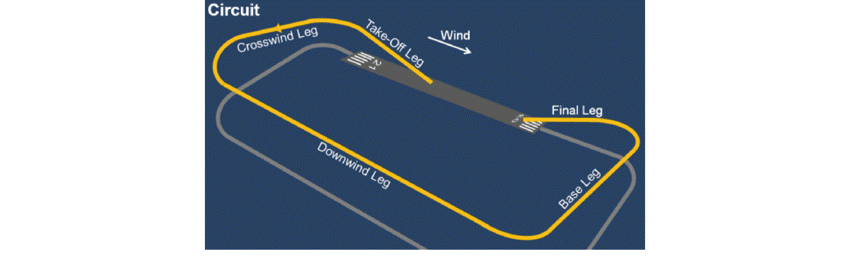
When you are approaching the extended centreline of the runway turn to line up. Make your turns gentle and coordinated. It’s important to be ready to go around at any point if you’re not happy with the approach. Line up is often the problem and adding extra rudder and aileron to get back on centreline is a very very dangerous thing to do! I’ve done it before someone explained ADVERSE YAW! It chills me when I think how close I possibly came to stalling and crashing as so many do on late final!
Read on! Warning –
Adverse Yaw – If Nothing else PLEASE Listen to This WARNING!
Real world or flight simulator flying, you have to be conscious of how much rudder you use in a turn. This is especially important when your slow and already banking. If you use a lot of rudders to try and increase your turn rate because you overshot the centreline. What can happen is that the outside wing of your aircraft in the turn exceeds critical angle of attack first and stalls!
Your aircraft will roll uncontrollably to that side, and you will spin into the ground! This is especially dangerous on the BASE TO FINAL turn! So many real-world pilots die making this error! If they just went around and tried again, they would be alive today, but they are NOT!
DANGER – Reiteration – Read and Remember!
When turning tight to get back onto the centreline and adding a lot of rudder causes the outside wing to create a lot more ANGLE OF ATTACK! This wing will stall first causing the aircraft to drop that wing on the outside of the turn and spin in the opposite direction to the turn. Generally, this is not recoverable before hitting the ground.
This effect is known as ADVERSE YAW. Lined up on the centreline descend gently on your final. If your happy you will reach the runway you can use the last selection of flap. Trim and watch the speed as this happens.


Landing.
As you pass the extended runway area reduce power to idle, hold your aircraft just off the ground till it cannot fly any more holding the nose up a little as you slow. When you transition from the descent to holding the aircraft off move your focus from the touchdown point to the far end of the runway. If you concentrate on the touchdown point you will fly into it hard and bounce.
Looking down the runway will allow you to reference the aircraft nose attitude vs the runway. You should hold off the aircraft till the stall warning is blaring in your ears and the wings finally given up all their lift. Congratulations you have flown cross country in a small plane in VR and landed safely. It was quite an achievement and as always, a lot of fun. Congratulations.
Additional PC /Gear Options
If you need some more guidance on gear for your PC there is some general information you may find worthwhile. If your new to flight simulation, you can certainly just have a single joystick and enjoy it. The addition of rudders in GA/Airliner/Helicopter flying is pretty important for realism.
Flying an aircraft ai can attest with my own real-world flying is an all hands and feet on the job task. If you prefer a yoke there are plenty on the market to consider. If you fly combat in DCS World, then a HOTAS can encompass everything you need along with rudder pedals.
The big consideration in my book is VR or monitor flying. Having waited 30 years for VR to become a reality I will not fly any other way! The depth perception and immersion both make the experience pretty incredible!
If you’re not happy in VR then a face tracking app like facetracknoir for a few dollars or TrackIR which is excellent but more expensive should be your answer! Everyone’s desires are different for sure.
For me wearing a pilot suit and helmet looks ridicules and building a full cockpit is time consuming and again in VR currently a waste of time in my opinion. Having said that I know people that feel wearing the gear and or being in a cockpit make the experience so much more enjoyable. You must take your own path and disregard people who mock you! You do what you want! Enjoy this incredible pastime we share!
Flight Simulator Choices
Today there are a range of new and soon to be released flight simulators offering incredibly realistic flying. Popular flight simulators currently available are Prepar3d by Lockheed Martin and X Plane 11/12 by Laminar Research. Microsoft Flight Simulator 2020 is one of the most recent releases and for graphics it’s unbeatable. The weather and cloud rendering makes it amazing.
The next simulator on the horizon is the update to X Plane 11’s very popular flight simulator which will be X Plane 12. This upcoming flight simulator also looks to offer amazing scenery and incredible weather representations and as always, the best flight model of them all in my humble opinion.
Flight Simulator PC Requirements
Flight simulators regardless of creator all demand the most powerful computer you can afford. It’s worth checking out the recommended settings for X Plane, MSFS 2020 as well as Prepar3d to get an idea if your current PC could run them. Running a flight sim on a laptop is possible but it will need dedicated graphics card to do this.
If you’re looking at what the top Spec PC currently costs, there is a post here you may wish to check out. I suggest you look at the recommended as a minimum and shoot as high as possible.
Flying Across the Country in a Small Plane in VR.
Once you have chosen a flight simulator you are ready to go flying cross country in a small plane in VR and enjoy all flight the simulation has to offer. You want to do this in VR right? Well flying across the country in a small plane in VR you’re going to need the best VR headset you can afford. Check out below.
VR Headsets – The best Options
There are a number of current headsets that give great performance and very good clarity for the user. These do this far better than the original units when VR was released. Higher resolution displays as well as better optics have made today’s VR units very desirable.
- Oculus Quest 2. Best stand-alone VR. $299 at Oculus.
- HP Reverb G2. Highest-Resolution PC VR Headset. $599 at HP.
- Valve Index. Best PC VR to explore the future of VR controllers. $999 at Steam.
- Sony PlayStation VR. Still worth it for the games. $246 at Amazon.
- Latest CPU’s Available Now – Amazon.com
- Get a NEW GPU Best Performance – AMAZON.com
- Upgrade RAM Here today – AMAZON.com
- Prebuilt PC Options – AMAZON.com
Fly With Me in VR – MSFS 2020
Flying in VR is amazing so please feel free to check out this flight I did in MSFS 2020. It starts and returns Innsbruck (LOWI) which is such a beautiful area. I would love to fly here for real and visit this beautiful part of Europe.
This second flight is from Chiang Mai to Chiang Rai in Thailand. It was a great cross-country flight but in a slightly more complex aircraft. The Diamond DA 62 has twin engines as well as retractable landing gear. The amazing thing about the Diamond DA62 is the automatic management of the prop and engine by simply setting the throttle. No mixture and prop settings to control. I hope you enjoy this beautiful flight.
Author
Brendon McAliece (Aka Gunnie) is a military veteran with 23 years working on Jet Fighters, their weapons systems and ejection seat/module systems as well as munitions and R&D. Involved with flight simulation since the 1980s, he has flown all the major flight simulators over the years.
He is an Australian expat who has lived in Malaysia, UK, Saudi Arabia and more recently Thailand. He is a multi-lingual blogger who loves to share his life experiences here on LetsFlyVFR.com and DreamingGuitar.com, with his lifestyle and Travel experiences Blog plus his Dreaming Coffee website.
Learn More @ DreamingGuitar.com – DreamingCoffee.com – LetsFlyVFR.com
( HOME – BLOG – SHOP – ABOUT )
As an Amazon affiliate I may benefit from qualifying sales.